
How to discharge a capacitor: thirty seconds, then measure.
The filter capacitors in a tube radio or amplifier hold their charge after the set is unplugged, sometimes for a very long time. Discharging them properly is the procedure that makes every other repair safe to attempt, and it takes about thirty seconds plus a meter reading.
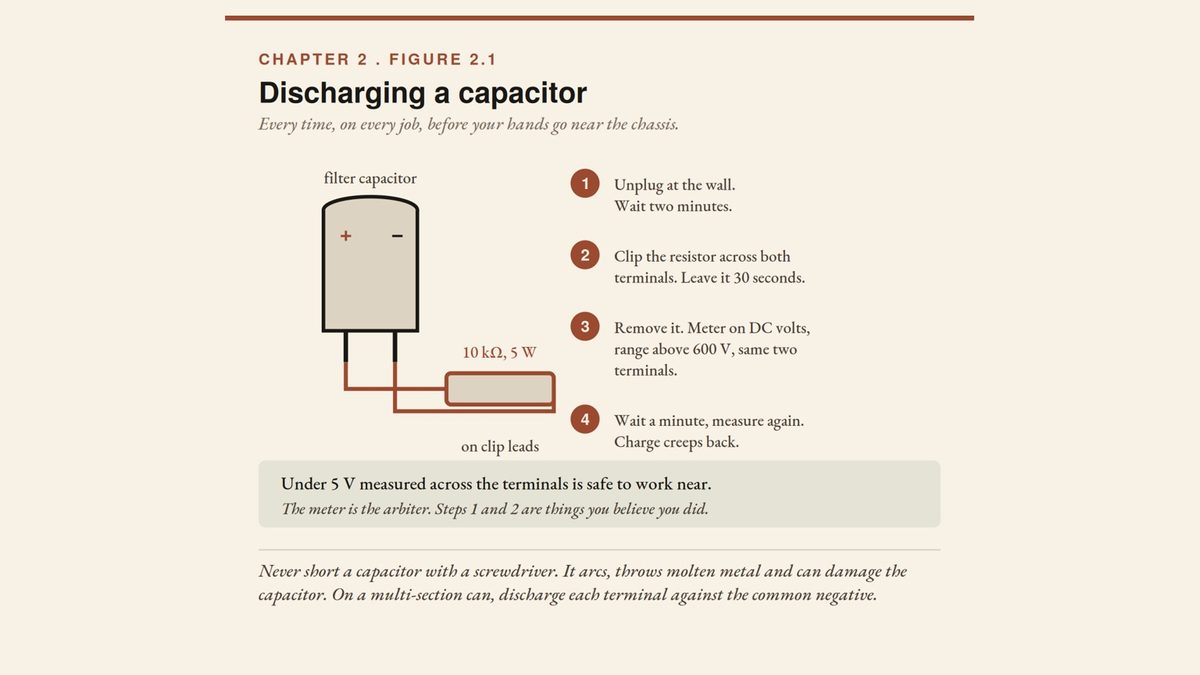
Unplug at the wall and wait two minutes. Clip a 10 kΩ resistor rated at 5 W or more across the capacitor's two terminals and leave it for thirty seconds. Remove it, set the meter to DC volts on a range above 600 V, and measure across the same terminals: under 5 V is safe to work near. Wait a minute and measure again, because capacitors recover a little charge. Never short a capacitor with a screwdriver.
Safety first. Tube equipment can hold enough stored energy to kill you after it has been unplugged for a day. Unplug at the wall, discharge every large capacitor, and measure before your hands go in. Work one-handed on anything that might be live. If you are unsure, stop: equipment that has waited forty years will wait another week.
Build the discharge tool
You need a 10 kΩ resistor rated at 5 W or more, with insulated leads and an alligator clip on each end. Build one, keep it in the drawer, and use it for the rest of your life.
You also need a digital multimeter rated to read at least 600 V DC, with a CAT II 600 V safety rating or better. Many inexpensive meters top out at 200 V DC, which is useless here: the supply rail in a tube amplifier commonly sits between 250 V and 450 V, and a meter that can't read it may be damaged or show a falsely low reading.
The procedure
- Unplug at the wall, then wait two minutes. Not the switch: switches fail, and some are wired into the neutral. Then set the meter to AC volts and check across the mains input to confirm what you unplugged is what was feeding it.
- Clip the resistor across the capacitor's two terminals. Attach both clips before you look away, and leave it in place for thirty seconds.
- Remove the resistor and measure. DC volts, on a range above 600 V, across the same two terminals. Under 5 V is safe to work near.
- Wait a minute and measure again. Capacitors recover a little surface charge after a discharge, and a can that read zero can read tens of volts a minute later.
Thirty seconds and 5 V are rules of thumb. The meter reading is the only step that produces evidence rather than confidence, so never skip it.
Multi-section cans
One can often holds three or four capacitors that share a common negative, with markings like a triangle, a square, and a half-moon beside the terminals. Clipping across one pair discharges one section and leaves the others charged. Work around every marked terminal against the common negative, and measure each.
In a power supply, filter sections are linked through resistors, so a section can be topped up by its neighbors faster than the resistor drains it. If one won't come down, isolate it by lifting one lead and discharge it on its own.
Why 5 watts
A 40 µF filter capacitor charged to 450 V holds about 4 joules, enough to burn you and to cause the involuntary jerk that puts your other hand somewhere worse. Averaged over the couple of seconds a discharge takes, that's roughly 2 watts, which is why some sources say a 2 W resistor will do.
The problem is the first instant. When the resistor first touches, the full 450 V is across it: 450 squared divided by 10,000 ohms is over 20 watts. A 2 W part usually survives the pulse, but "usually" is a strange standard for the one component between a charged capacitor and your hands. A 5 W part costs pennies more.
The resistor getting warm is normal. If it gets hot enough to smell, the value is too low or the capacitor is far larger than you assumed: stop.
When it won't discharge
Don't reach for a screwdriver. Shorting a capacitor arcs, throws molten metal, can damage the capacitor, and on a large one is genuinely dangerous. The usual explanations are simpler:
- A clip has slipped.
- The meter is on the wrong range or has a blown fuse. Check it against a fresh battery before concluding anything.
- You're across the wrong terminals, which is easy on a multi-section can.
A capacitor that genuinely holds its charge against a bleed resistor is unusual and not a beginner's problem to solve. Leave the resistor connected, walk away, and ask somebody.
Fit a bleeder on sets you keep
On a set you own and expect to open again, fit a permanent bleeder resistor of around 220 kΩ across the main filter, rated for the voltage. It drains the supply every time the set is switched off. You still discharge and measure, but you're never facing a fully charged can.
The rules around it
- Work one-handed when probing anything that might be live, with the other hand in a pocket or behind your back. Clip the black lead to chassis ground and probe with the red.
- Remove rings and a watch before you start.
- No wrist strap on powered equipment. It connects you to earth on purpose.
- Watch for transformerless sets. On radios like the All-American Five, the chassis itself can sit at mains potential. See vintage radio repair.
With the capacitors safe, the most common next job is replacing them: see recapping a vintage radio or amp.
What you need to discharge a capacitor
- 10k ohm 5 W resistorThe discharge tool: 10 kΩ rated at 5 W or more, because the first instant at 450 V is over 20 watts.See options on Amazon →
- Digital multimeter, 600 V DCIt must read at least 600 V DC with a CAT II 600 V rating or better. The reading is the only proof the capacitor is safe.See options on Amazon →
- Insulated alligator clip leadsInsulated leads with a clip on each end, so both clips stay on for the full thirty seconds.See options on Amazon →
- 220k ohm bleeder resistorA permanent bleeder across the main filter on sets you keep, rated for the voltage. You still discharge and measure.See options on Amazon →
These are Amazon links. If you buy through them I earn a small commission, at no extra cost to you.
Run the checks before you plug it in
Get the free Vintage Tube Amp Pre-Power Checklist: six checks to run before an old amp or radio goes anywhere near the wall.
One free PDF, delivered instantly. No spam, unsubscribe anytime.
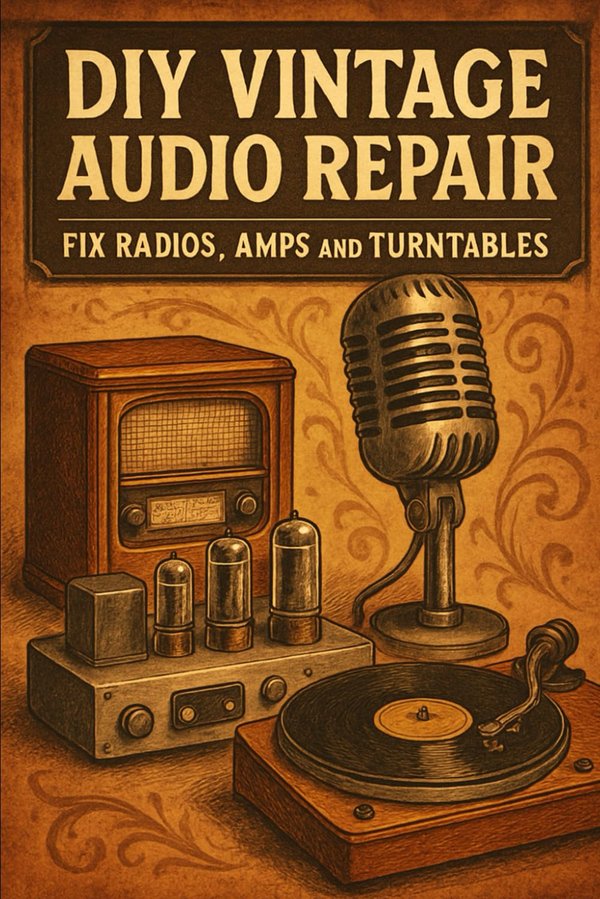
DIY Vintage Audio Repair
Tube radios, amplifiers, and turntables: parts, safety, recapping, hum, signal path, controls, radio faults, and five full repair walkthroughs.
Read it on Amazon →What resistor do I use to discharge a capacitor?
A 10 k ohm resistor rated at 5 W or more, with insulated leads and alligator clips. Clip it across the terminals for thirty seconds, then confirm under 5 V with a meter.
Can I discharge a capacitor with a screwdriver?
No. It arcs, throws molten metal, can damage the capacitor, and on a large one is genuinely dangerous. Use a resistor and confirm the result with a meter.