
The second fermentation: flavor and fizz.
The fizz does not come from the jar. It comes from the second ferment, when you bottle finished kombucha with a little fruit and seal it so the gas has nowhere to go. It is the fun part, and the only stage where pressure is real.
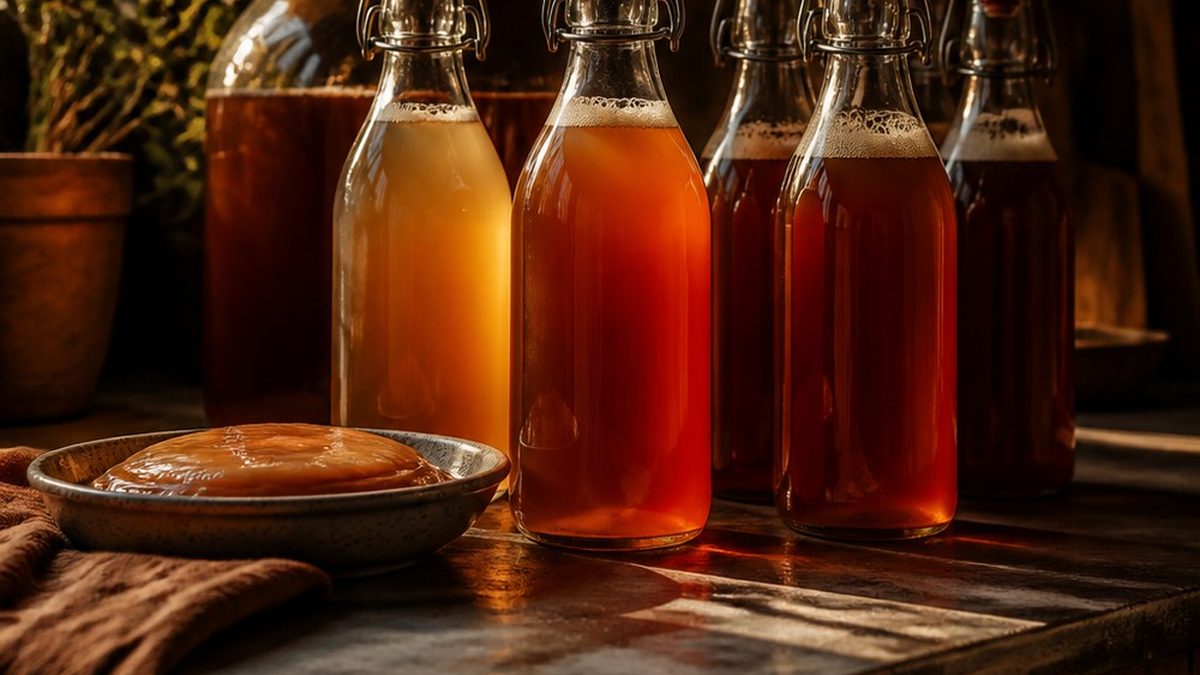
Pour the finished kombucha into pressure-rated bottles, add fruit, juice, or ginger, leave about a thumb of headspace, and cap tight. Keep them at 75 to 85°F and check one each day. When a bottle opens with a soft hiss and bubbles rise, move them all to the fridge.
Why is my kombucha not fizzy?
Four quick answers for flat bottles, sour ones, or a geyser, and you will get the fix in order.
Use bottles built for pressure
Carbonation builds real pressure, fast in warmth and with juicy add-ins. Use swing-top bottles with thick glass, or sturdy reused soda bottles. Do not use mason jars, wine bottles, or thin decorative bottles, which were never made to hold pressure and can fail. Check swing-top gaskets for cracks and the glass for chips around the lip, and test any new bottle with water first.
The bottling flow
- Pour off the kombucha. Strain the finished batch into bottles or a clean glass pitcher, leaving enough in the jar to cover the SCOBY. That leftover is your next starter, so keep it tart and never top it up with water.
- Flavor in the bottle. Drop in fruit, a splash of juice, a few coins of ginger, or some herbs. That bit of sugar feeds the yeast and makes the fizz; a plain, dry bottle stays flat. Start small.
- Fill and cap. Use a funnel, pour over the flavoring, and leave about a thumb of headspace below the neck. Cap it tight.
- Leave it warm. Keep the bottles in the same 75 to 85°F spot the jar used, and check one each day.
- Chill when it is ready. When the tester opens with a soft hiss and you see bubbles threading up the glass, move everything to the fridge. Cold holds the gas in and stops the yeast where you like it.
A useful trick: put one clean plastic soda bottle in each batch as a gauge. When it goes from soft to firm under a squeeze, your glass bottles are pressurized too.
Six flavor pairings that work
Each pairs one fruit or root that carries easy sugar with a small helper. Start with one, not everything at once.
- Ginger lime: thin slices of fresh ginger and a squeeze of lime.
- Strawberry basil: sliced strawberries with a few torn basil leaves.
- Pineapple mint: pineapple chunks and a couple of mint leaves.
- Blueberry lemon: a handful of blueberries and a strip of lemon zest.
- Mango chili: mango pieces and a tiny pinch of chili flakes.
- Apple cinnamon: apple slices and a small piece of cinnamon stick.
Cut fruit small so it infuses quickly and does not wedge in the neck. Use thin zest instead of whole peel, and soft leaves instead of woody stems. Avoid oily add-ins like creamy purees or nut flavors, which make the bubbles pop early.
Getting steady fizz
Fizz comes down to feeding the yeast and managing warmth. Give every bottle real food, whether fruit, juice, or a small spoon of sugar. A pinch of the tan sediment from the bottom of your jar, split across the bottles, gets things going fast. Build the pressure warm, then chill only once you have it.
For a drier, fizzier bottle, start from a tarter base and flavor it lightly. For a softer, fruit-forward bottle, add more juice, but watch it closely: more sugar means faster pressure.
Quick fixes
- Flat bottles: the yeast ran out of food or got cold. Add a splash of juice or a little sugar, keep them warm, and add a pinch of sediment.
- Sour but no fizz: the base was already too dry. Add a little juice or sugar and rewarm, and next time bottle while a thread of sweetness remains.
- A geyser on opening: too much sugar or too much heat. Chill the rest hard and open slowly over the sink under a towel. Next time, use less fruit and fill a touch higher.
- Bitter or pithy: citrus pith or tired herbs. Switch to zest only and fresh leaves.
- Cloudy or bready: yeast in suspension, which is harmless. Stand the bottles upright in the fridge and leave the last cloudy sip behind.
Handling full bottles safely
Keep bottles out of sun and heat, and stand them in a box or bin while they build. With a new flavor or a new bottle, crack the seal once a day to vent gas until you learn how fast it climbs. Chill before opening, and open over the sink, pointed away from your face. Retire any bottle with a chip or hairline crack.
What you need for the second ferment
- Swing-top glass bottlesThick glass built to hold pressure. Test any new bottle with water first.See options on Amazon →
- Small funnelPour over the flavoring and leave about a thumb of headspace below the neck.See options on Amazon →
- Glass pitcherStrain the finished batch into a clean glass pitcher, then fill the bottles from it.See options on Amazon →
- Swing-top gasketsCheck the gaskets for cracks, and replace any that are worn.See options on Amazon →
- Bin for the bottlesStand the bottles in a box or bin while they build pressure, out of sun and heat.See options on Amazon →
These are Amazon links. If you buy through them I earn a small commission, at no extra cost to you.
Keep the checklist by the jar
Get the free SCOBY Rescue Checklist: whether what you are seeing is normal or a real problem, and how to fix the real ones.
One free PDF, delivered instantly. No spam, unsubscribe anytime.

Kombucha Brewing for Beginners
The full guide: the base recipe, tasting and timing, the second ferment, pH testing if you want it, troubleshooting, and keeping it going.
Read it on Amazon →How long is the second fermentation for kombucha?
There is no fixed number of days. Keep the bottles at 75 to 85 degrees F, check one daily, and move them all to the fridge once a bottle opens with a soft hiss and rising bubbles.
Why is my kombucha not fizzy?
Usually the yeast had no food or got cold. Add a little fruit, juice or sugar to each bottle, keep them warm, and add a pinch of sediment from the brewing jar.