
How to cut a cabochon by hand: no saw, no grinder.
You can turn a rough slab into a smooth, glossy cabochon at a kitchen table with a couple of files, wet-or-dry sandpaper, and a spray bottle. The whole job is four moves, trace, rough the outline, cut a bevel, and round the dome, then a careful climb through the grits.
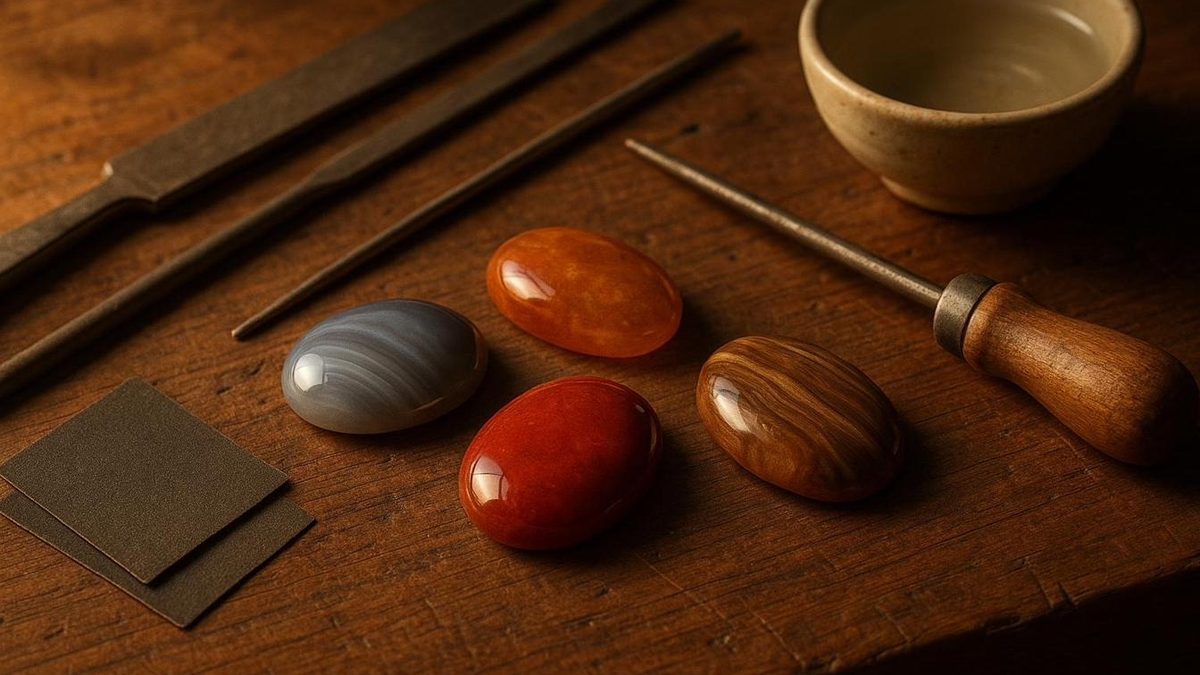
Pick a tough stone like jasper or agate (Mohs 6.5 to 7) on a 4 to 6 mm slab. Trace the outline, nip or grind to the line on wet 80 to 120 grit over a flat tile, cut a 45-degree bevel, and blend it into a dome. Then sand 220, 400, 600, 800, 1200, and 2000, clearing every scratch before you move up, and polish with cerium oxide on firm felt. A first thumb-sized cab takes the better part of an hour.
What you need
- Files: a flat and a half-round steel file, medium cut.
- Wet-or-dry silicon carbide paper in 80, 120, 220, 400, 600, 800, 1200, and 2000.
- A dead-flat backing: a glazed tile or a piece of glass.
- Water control: a spray bottle with a drop of dish soap, and a tray to catch the slurry.
- A dop: a wooden dowel and gel super glue, plus masking tape.
- Polish: cerium or aluminum oxide with felt or leather.
- Safety: safety glasses and a P100 respirator for anything that dries out.
Tile nippers are a handy extra for roughing the outline. The full kit and prices are in lapidary tools for beginners.
Pick a forgiving stone
Start with jasper, chert, agate, aventurine, quartzite, or well-silicified petrified wood, all around Mohs 6.5 to 7. They grind predictably, hold a dome without chipping, and take a strong polish. A first slab under a couple of inches long and about a quarter inch thick gives you a standard 18 by 13 mm oval or a 20 mm round.
Leave obsidian, calcite and marble, slate and schist, fractured or porous rough, opal, and turquoise for later. Why some stones fight you is covered in Mohs hardness for hand cutting.
Step 1: read the stone and trace
Wet the slab and backlight it with a phone before you commit. Hairlines that vanish when the stone is dry come back when it's wet. Turn your template so the pattern reads well, and keep the line a couple of millimeters inside any fracture or soft seam.
Trace an oval or round with a fine permanent marker. Marker washes off once it's wet, so for a line that survives, scribe lightly along the template with a needle and rub pencil into the groove. Mark the display face with a small X.
Step 2: check the thickness
4 to 6 mm is the friendly range. Under 4 mm, plan a lower dome and a slightly wider girdle. Over 7 or 8 mm, flip the slab and plane the back flat on fresh 80 until you reach 5 to 6 mm.
Step 3: rough out the outline
With tile nippers: glasses on, hold the stone over a towel-lined tray and take rice-grain bites a hair outside the line, turning the stone a little after each nip. Many small cuts beat one big snap. Skip nippers on obsidian and visibly fractured stone, which shatter rather than nibble.
Without nippers: wrap 80 grit over the tile, mist it, and run figure-eights just outside the line, turning the stone often so you don't grind a polygon. It takes longer than nipping. If the stone warms your fingertips, you're pressing too hard or running dry.
Step 4: grind to the line and square the girdle
On wet 80 over the tile, work loose figure-eights, keeping the whole face flat on the paper and turning the stone as you go. Grind to a hair outside the mark, then stand the stone upright and take the last sliver slowly.
Next, stand the cab on its edge and slide it in straight passes to square the girdle, the band around the rim. You want one continuous bright ring about 1 to 1.5 mm wide. A leaning girdle fights every setting you try to put it in.
Flip the stone and run one light pass around the back edge at about 45 degrees: a tiny back bevel, half a millimeter at most. It kills the knife edge that loves to chip later.
Step 5: cut the bevel and raise the dome
Pencil a guide ring a couple of millimeters in from the edge. On 80 to 120, tilt the cab to about 45 degrees and sweep the edge in smooth arcs until the bevel just reaches that ring all the way around.
Switch to the half-round file or 120 and blend the bevel into a dome. Start on the high crown and sweep long arcs that cross the bevel and run off the far side, like drawing parentheses across the face. Never aim straight at the edge, which thins the lip and invites chips.
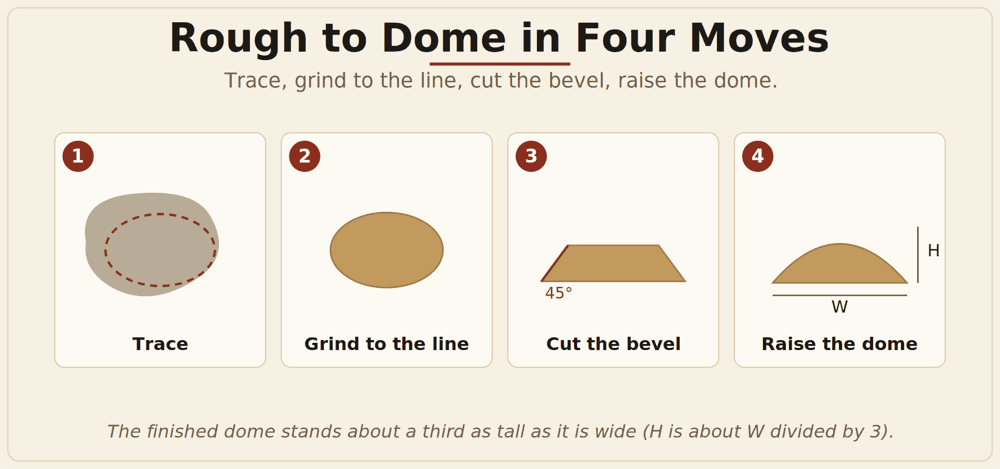
Check the profile. For an 18 by 13 mm oval, aim for a crown about 2.5 to 3 mm above a 1 to 1.5 mm girdle. Tilt the cab under a lamp: if the highlight glides without stuttering, the dome is even. A jump marks a flat.
Use the pencil grid. Scribble a light crosshatch on the face and grind until it vanishes evenly. Lines that cling in the center mean the crown is low; lines that cling near the rim mean the outer dome is low.
Dop it for control. Scuff the back, press painter's tape on, add a drop or two of thin super glue, and press a quarter-inch dowel straight down. Glue in moving air. To release, wick 91 percent isopropyl around the tape and twist gently.
Step 6: sand up the ladder
Run 220, 400, 600, 800, 1200, and 2000, with an optional 3000. Before each grit, draw a pencil crosshatch, sand in one direction, and turn your stroke a quarter at the next grit so leftover scratches stand out. Move up only when every scratch from the last grit is gone. Rinse the stone, your hands, and the backing between grits. One stray coarse grain will haze a fine finish.
Step 7: polish
Charge firm felt or leather with a thin cream of cerium oxide and polish with light pressure in small circles, keeping the pad just damp. Within a minute or two the highlight sharpens to a point. If it clouds, you're seeing leftover scratches or stray grit: clean everything, back up to 1200, and repolish. The full method is in how to polish stones by hand.
When it fights you
- Edges chipping: the dome has no shoulder. Cut a continuous 45-degree bevel a couple of millimeters wide on fresh 80 to 120, and add a tiny back bevel.
- Out of round: mark crosshairs, dot the high spots, and touch only those, rechecking against the template.
- A deep scratch that won't leave: drop one grit coarser and work the whole face until the scratch and the pencil grid disappear together. Spot-sanding just the groove dishes a flat into the dome.
- It's taking forever: suspect the paper first. A spent sheet looks glossy and squeaks. Swap to fresh 80 and commit to the cut.
Before you cut serpentine: some serpentine and soapstone carry asbestos fibers, which are hazardous to breathe. Buy from a seller who confirms the stone is asbestos-free, keep it wet at every step, wear a P100 respirator, and never dry-work it. Treat any unlabeled green stone as suspect.
Work wet at every step. Wet work keeps the silica dust out of the air, and glasses go on before you pick up the stone.
What you need to cut a cabochon by hand
- Wet/dry sandpaper, 80 to 2000Silicon carbide paper from 80 to 2000 does the shaping and the whole grit ladder.See options on Amazon →
- Flat and half-round filesA flat and a half-round steel file, medium cut, for the outline and the dome.See options on Amazon →
- Safety glassesGlasses go on before you pick up the stone, and stay on while you nip.See options on Amazon →
- P100 respiratorFor anything that dries out. Working wet is still what keeps the silica dust down.See options on Amazon →
- Cerium oxideA thin cream on firm felt or leather for the final polish.See options on Amazon →
- Carbide tile nippersA handy extra for roughing the outline in rice-grain bites.See options on Amazon →
These are Amazon links. If you buy through them I earn a small commission, at no extra cost to you.
Keep the checklist on your bench
Get the free Cabochon Starter Checklist: the beginner stones, the hand tools, the grit order, and the safety steps on one page.
One free PDF, delivered instantly. No spam, unsubscribe anytime.
The Hand-Tool Lapidary Handbook
Shape, polish, and finish gemstones by hand: forgiving stones, budget tools, the grit ladder, three first cabochons, carving, polish, and fixes.
Read it on Amazon →How long does it take to cut a cabochon by hand?
A first thumb-sized cab in jasper or agate takes the better part of an hour. Soft serpentine takes well under that, a bigger oval roughly doubles it, and a small stud roughly halves it.
Can you cut a cabochon without a machine?
Yes. Files, wet-or-dry sandpaper on a flat tile, a spray bottle, and a little cerium oxide on felt take a stone from rough to glossy, with no saw or grinder.